Article also available in other languages

Various models that are based on, or simply copy, the Glock design are one of many indicators that the gun represents a cornerstone of a new generation of handguns. The Austrian pistol has set the standards for the modern sidearm. The Glock is easy to use, reliable, it has a high capacity of fire and above all, it is inexpensive. These were the standards other manufacturers needed to achieve, and therefore, developed similar handguns with a striker system based on a spring loaded firing pin, without a hammer and with a polymeric frame.

Because there are no manual safeties and because it is snag free, the trigger weight pull remains the same from the first to the last round and it works very well without tedious maintenance thanks to the small inserts which help the cycling. All this makes Glock one of the most reliable guns you can use for personal defense.

No matter what they say, we think Glock is one of the safest guns out there – whether they are in the hands of a skillful professional or a beginner. The only important rules you need to know are the following: assume your gun is always loaded, so never touch the trigger until you actually want to shoot; point the gun towards safe areas and take into consideration the consistence of your target before you shoot.
There are two downsides to Glock, in our opinion. The first one is easy to fix: the rear sight tends to move away from its position, affecting zero. All that’s needed is a little glue or the aiming devices altogether can be replaced with various options available on the market, in case you don’t like to compromise. The second problem is the required dry fire, every time you want to disassembly the gun.
Dry or test shooting, when executed outside of the shooting range, is the most common reason behind domestic accidents that happen when the gun is not used properly. This was proven true by various models of guns with the striker, recently in use, with mechanical devices that deactivate the firing system without pushing the trigger.
Glock guns can be upgraded in various ways in order to be fit the needs of any shooter. There are companies that make complete trigger systems or single parts that allow you to change the trigger pull weight or the trigger travel. Furthermore, you can find magazine ejection buttons and larger hold-open levers. All these upgrades should be studied carefully if you use the gun for personal defense.
Aiming devices and various aiming systems are very present on the “after market”. However, there are some devices that add additional manual safeties to the gun, which make no sense at all.
For DIY or for a safe occasional cleaning, you need to know how to disassembly the Glock which, as every mechanical assembly, has easily breakable parts. Nothing lasts forever.
Remember to start disassembling the gun only once you’ve made absolutely sure that the gun is not loaded, then remove the magazine and cycle the slide in order to see if the chamber is empty as well. You should do this with your muzzle pointing towards a safe area and making sure you don’t put your finger on the trigger.
Then, in order to set back the system in the resting position and allow the disassembly of the gun, as we’ve said, once you cycled the slide, you need to execute a dry fire, minding the direction the muzzle is pointed towards.
You should hold the gun with your stronger hand, moving your thumb underneath the hilt and pushing it against the recoil spring, with your palm laterally over the slide. Then, pull back the slide for a few millimeters. At the same time, the index and thumb fingers of your weaker hand should pull down the slide lock on both sides of the frame.
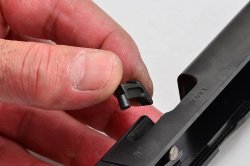
The slide can now be pushed forward and separated from the frame. We also take out the slide lock in rest position.
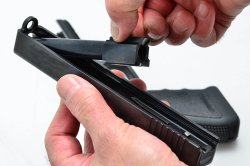
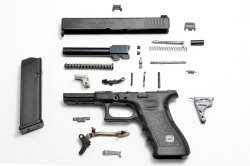
Then, take the recoil spring guide with the captivating spring and take out the barrel from its position in the slide. The gun is now field-stripped.
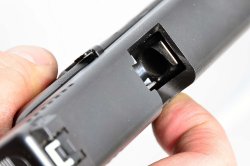
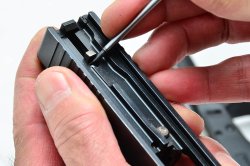
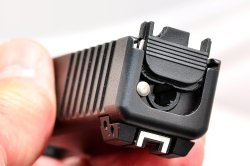
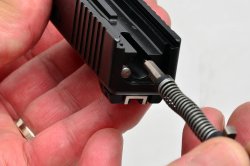
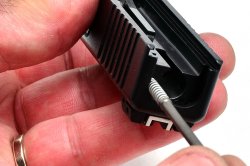
With the right tool (a small diameter punch, known universally as “the Glock disassembly tool”), you can push the striker forwards and in this way free the rear slide cover plate that goes to its guide and keeps the firing pin and the extraction pin in their position.
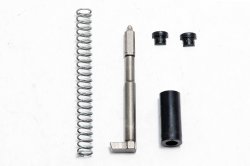
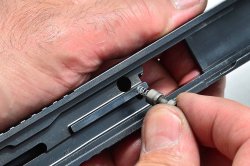
Once you take these two elements out, you can move on and take out the extractor and the small automatic firing pin safety together with its tiny spring.
The firing pin works due to a spring fixed by two cups and a plastic tube that can be easily separated.
In order to remove the frame components, you need to remove the cross-pin you can see on the sides. You should use the right drift punch – see above.
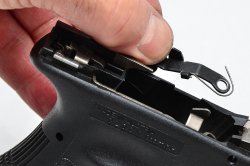
Once you remove the cross-pins, take out the slide stop lever and then the trigger sub-frame. The trigger system package can then be disassembled in its smaller parts, so they are easy to replace in case they get broken or if you want to change the trigger pull weight or the trigger travel.
You can disassembly the barrel locking block. You can remove this element if you push the right laminate lever which holds it, downwards.
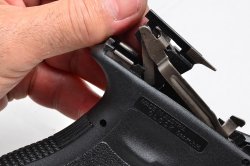
Learning how to disassembly a gun can help you better understand the way the gun works and solve any puzzles you may have about the hammerless guns that don’t have manual safeties of any kind.
Actually, Glock integrates the safeties that matter: the automatic ones that keep the gun from shooting if you don’t voluntarily press the trigger or in case it falls on a hard surface.
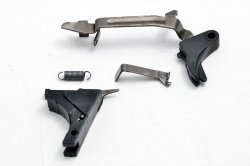
When it comes to the easily-breakable parts, we have only words of praise for this gun. But we still feel the need to insist that thermo-ballistic machines can always break after any period of use. Our personal experience, that we share with you, is that after 10.000 rounds, a small trigger bar spring, located on behind the trigger package, broke. Another model bought recently showed that one of the takedown latch blade springs, which keeps the disassembling lever, stopped working after a few hundred rounds.
Minding those few downsides, we advise you to periodically replace these springs, which are very affordable.
Sure, you can go ahead and replace some parts of the Glock with expensive materials such as titanium alloys, a lightweight competition trigger sub frame, aiming devices of various sorts and night-vision inserts, luminous dots and many other accessories available on the market and in this way the gun could end up being twice as expensive.


