

Pard is a high-tech company from China with its headquarters in the economic center of Shenzhen. It specialises in the development, manufacture and international distribution of night vision and thermal imaging technology. Since its launch in 2017, Pard has established itself worldwide as a recognised manufacturer of optoelectronic devices for hunting, outdoor use and security-related applications. Pard offers a wide range of night vision and thermal imaging devices, including
- NV007 series: Digital night vision devices characterised by easy handling and high image quality.
- NV008 series: Compact night vision riflescopes with integrated rangefinder.
- Thermal imaging devices: Handheld devices and riflescopes for various applications.
Pard products are known for their good price-performance ratio and are appreciated by hunters and outdoor enthusiasts worldwide.
How do you zero the Pard clip-ons?
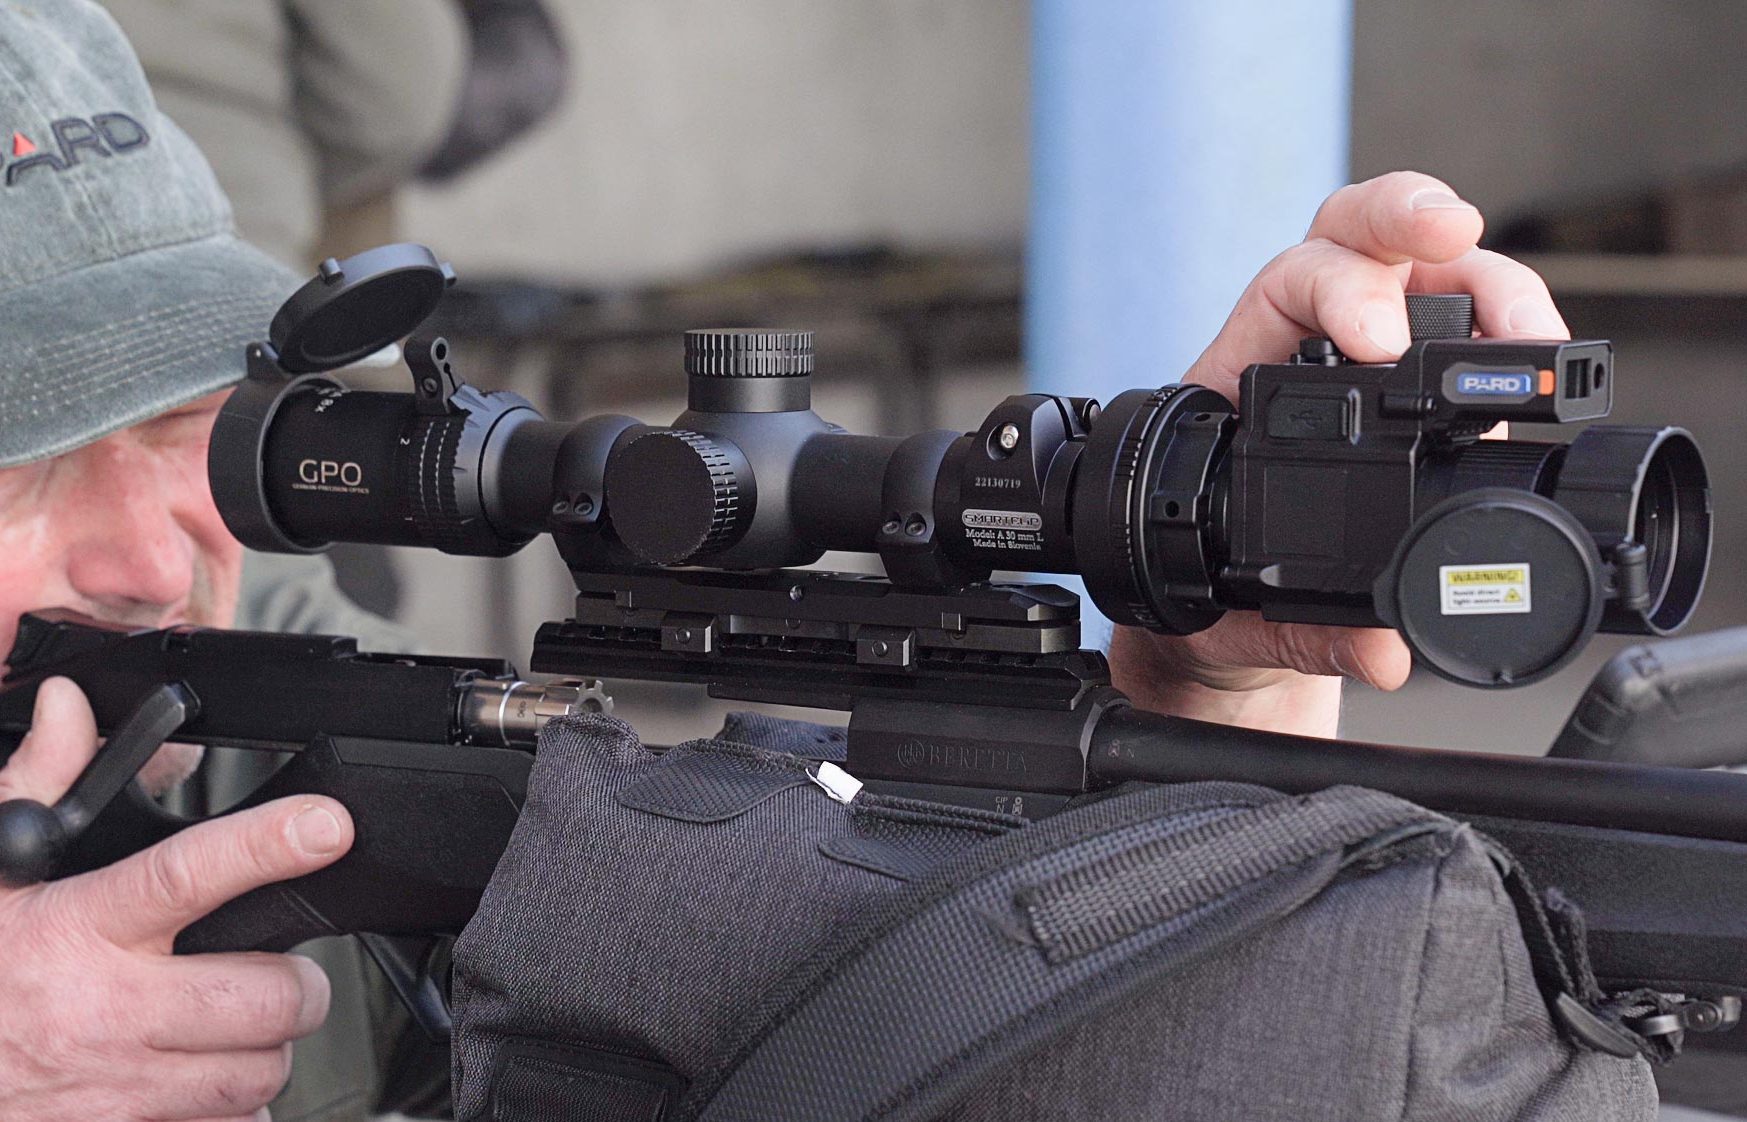
Zeroing the Pard Predator clip-ons is very simple. Briefly toggle key 4 to access the main menu. Then toggle key 5 briefly to scroll down the menu until you reach menu item number 3, Zeroing adjustment option. Then briefly press button 3 "OK" once. Now select your rifle profile. We take profile A and confirm this briefly with key 3. In the next window, we then see the selection Pre-zeroing option and Zero adjustment. Our tip: Start with the pre-zeroing option and adjust the red crosshairs of the attachment with the optical reticle of your riflescope. Once this has been done, continue with the zero adjustment.
Fire a shot at the heat pad and see where your shot lands. In our case, the first shot was about 8 cm below the heat pad. The lateral deviation was about 3.5 cm to the right. Please note that each click in the shift of the X-axis always changes the point of impact by 1.32 cm. In the Y-axis, on the other hand, you move 4 cm per click. Please also note that if you want to correct the point of impact upwards, you must move to the minus area. The same applies if you want to move the bullet impact to the right, you must also move to the minus area. Another important tip: use high-quality lock adapters, ideally bayonet locks, which enable repeatable mounting accuracy. Wrapping up:
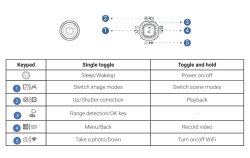
- Toggle key 5 to move the cursor to the zeroing adjustment setting option. Press key 3 to enter the submenu interface.
- Toggle key 2 / key 5 to select a set from five data sets (A-E) and press key 3 to enter it.
- Press key 3 to enter the Pre-zeroing option. Move the X/Y axis by toggling key 2 / key 5 to adjust the red reticle to coincide with the optical reticle.
- Press key 3 to switch the X/Y coordinates and then toggle key 4 to save and return.
- Toggle key 5 to enter the Zeroing adjustment option . Adjust the value of X/Y to move the yellow cross to the optical reticle and then toggle key 4 to return and save.
Note: each time you put the Predator back on, you can check whether the red reticle matches the optical reticle by pressing key 4 twice. The red reticle will automatically disappear after three seconds.
Self-activated recording: Pard Predator in practical use
When the device detects recoil, the whole shooting process will be recorded in 20 second intervals. The incremental 20-second video footage will be saved on the SD card.
Practical tip: setting the self-activated recording
- Toggle key 5 to move the cursor to the self-activated recording setting and press key 3 to enter the submenu.
- Toggle key 5 to switch between the "OFF", "ON" and "Impact sensitivity" options. Once you have selected "OFF" or "ON", press key 3 to save and return to the previous page
- Toggle key 5 to select "Low", "Medium" or "High" mode. Press key 3 to save and return to the previous page.
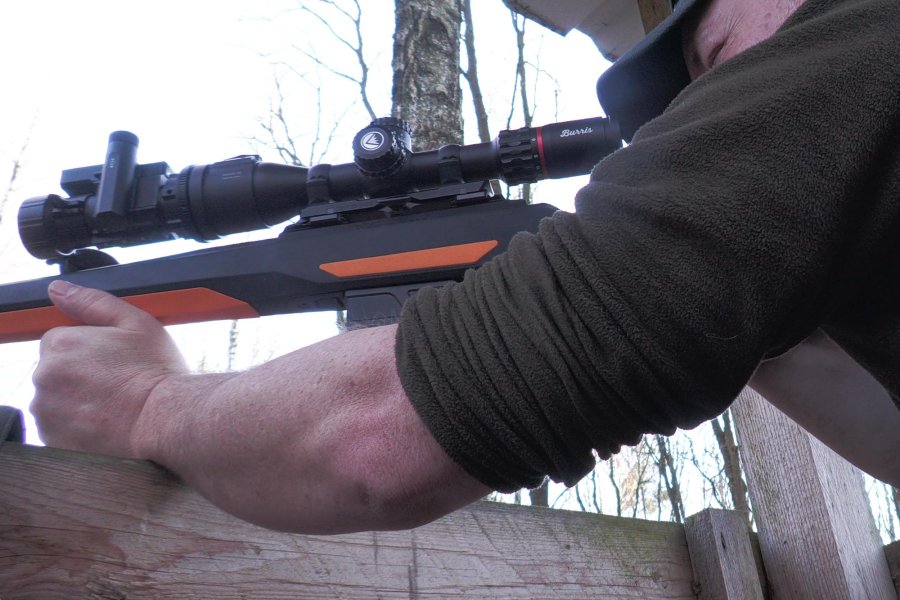
And Pard also makes it easy for left-handers: the devices from the Pard Predator series can also be operated with the left hand. To do this, release the focussing lever and place it on the opposite side of the device. That's how easy it is to get an attachment for left-handers.
On smartphone or PC: shot analysis with the PardVision2 app
To analyse the shot, download the PardVision2 app and install it on your smartphone. Connect your Pard device to your phone via WLAN. Use the following code for the Wi-Fi: 12345678. If the devices do not pair immediately, in our experience you will need a little patience. Especially when you are out in the field, it sometimes takes a while for the devices to pair. Once you have established the connection, you can view and download photos and videos directly on your smartphone. An alternative is to analyse them via a laptop. To do this, simply remove the memory card from your attachment and read the data using the card reader on the laptop. If you are using new memory cards in your device, they must be formatted in the device before they can be used.

Conclusion: Pard Predator – our experiences
Even after 6 months of use, our conclusion is positive. The price-performance ratio of the Pard devices can keep up with the competition and the devices are simply great to use. The devices can be operated with more or less two keys and with the range of functions, including laser rangefinder, self-activated video recording and a running time of around 5 hours, every user should be able to cope. Here are a few tips: please note that the device can be set to a quasi-hibernation mode, which naturally extends the battery life compared to the fully switched-on mode. For even more reserves, always switch the device off completely if you do not want to use it immediately. It is recommended to use a fully charged lithium-ion battery with a nominal voltage of 3.7 V. Switch off the device and remove the battery if you are not going to use it for more than 10 days and store the device and battery in a dry and safe place. Leave the lens cap on when you are not using the device. The device should be stored in a cool, dry and well-ventilated environment, strong electromagnetic fields should be avoided, and the temperature of the storage environment should not be lower than -30 °C or higher than 55 °C.


